Showing posts with label Projects. Show all posts
Thursday, July 17, 2014
Cheery Cherry
I wanted to take an art class to further my talent development, but the nearest community college is a 40 minute drive away, and one class would ring in a hefty price tag of nearly $1000. Add in the price of gas, and it's even more jaw-dropping. So I searched online for courses in a variety of universities, but came up empty. Art just isn't offered as a correspondence course anywhere I searched.
After some more perusing, I found an online art school taught from England. His first lesson was free, and it was this still-life study of a cherry:
This project was painted with acrylics on a 9x12 mounted canvas.
I really enjoyed creating this piece and learning new techniques. I started it late one night after the kids were in bed and finished it around midnight. It took around 2 hours to do, which is very fast (for me) since he did all the analyzing for me and just told me which colors to use in each part. It's the thinking that takes so long for me....when I paint, it's around 80-90% thinking and 10% putting the brush to the canvas.
Anyway, I'm excited to do more classes and stretch more. I view myself as a very rudimentary artist and I'd eager to grow in ability and confidence.
Wednesday, February 13, 2013
Hogwarts reading fort
Okay, I'm finally catching up on posts I promised and never delivered.
Here is the scoop on the Hogwarts reading fort I sewed for our kiddos this year as a Christmas gift.
The original pattern was supposed to fit over a card table.
After sewing for hours, I had the sinking realization that something was terribly wrong.
There was no way it was going to fit even one of my kids (unless it was Diego).
Boy was I hopping mad!
Look at the picture on the pattern:
Notice how the fort is as tall as the kids shoulders, and the top of the door is higher than his waist.
That looks like there is plenty of space to accommodate a ten year old, right?
Wrong.
Check out the height of the real product next to my real ten year-old kid:
Beensy.
The door is only as high as her knees and the roof is as tall as her waist.
Only one child could squeeze into the original fort.
So I decided to take drastic measures to save my creation.
We opted to skip the card table supports and build our own structure with PVC pipe, which would allow us the luxury of expanding Hogwarts and making it any dimension we wanted.
I doubled the size of the for by sewing two more walls and adding them as a back wing.
Now everyone can fit inside the fort nicely.
Take a peek inside the fort.
We have a long rug and comfy cushions creating a cozy and welcoming space.
We also ran indoor lighting inside Hogwarts. To avoid creating safety hazards, we opted for the rope lights instead of regular Christmas lights with the little bulbs. This way there are no bulbs that could be smashed, exposing live wires and creating perfect conditions for a fire.
(Live wires +dry felt=the perfect tinderbox)
I used velcro cable ties from Lowe's to hold the rope lights securely in place around the interior of the fort.
The fort sits rights next to an electrical outlet on the wall, so it's an easy thing to plug in the lights when children want to lounge and read.
Yesterday they all squeezed inside and called our Pyrenees dog to join them!
They all fit perfectly.
I'd call this a success.
Wednesday, January 30, 2013
Homesteading updates
As we begin to approach our two-year mark living in the country, I wanted to evaluate our progress in the homesteading goals we wrote when we first moved to the country. Here is the four-year plan we made, along with our progress report:
Year One-
-Move onto our new property. CHECK
-Give birth to our new little boy. CHECK (I didn't plan on postpartum depression, extreme sleep-deprivation, and exhaustion with this one....so I went into 'survival mode' and ignored our homestead plans for almost a year. Now that I'm out of the "new baby" phase, I'm quickly catching up with our plans for the property. I'm on fire with progress this month!)
-Repair the house and make the necessary improvements. CHECK, CHECK, CHECK, and still more to do. (Finish remodeling the garage into two additional rooms, demolish the badly-done extension that is literally rotting away and falling off the rest of the house. Oy.)
-Start our large chicken flock, including guineas and roosters this time. CHECK and CHECK (FYI- guineas are pretty annoying. And our guinea likes to scratch off the gravel on our composition shingle roof. I'm not sure they're keepers. We are slaughtering our last guinea during our next butchering day.)
-Incubate eggs so we can perpetuate the flock sustainably, without buying chicks online. CHECK, CHECK and CHECK. (We prefer letting a hen hatch the eggs rather than incubating them indoors. The hens take such good care of the chicks, and greatly reduce our workload regarding chick brooding/care.)
-Begin the compost pile so we will have soil amendments for our veggie garden. CHECK (We have several piles going. It's so nice to use rich homemade compost this year in our orchard and veggie garden!)
-Fence in the garden plot. CHECK
-Plant our herb garden this year. -we're working on this one now-
-Begin vermicomposting with kitchen scraps. CHECK (Sarah LOVES searching for worms in the pasture and relocating them to our compost bin. She'll spend hours at a time happily digging in the dirt hunting for worms and carefully cradling them in her hands as she carries them to their new home.)
-Raise enough meat birds to produce the meat our family will eat this year. CHECK and CHECK
-Slaughter the birds and preserve the meat in one long weekend. CHECK (One long weekend didn't work- we do several smaller batches instead. It's much easier to process the meat on a smaller scale.)
-Participate in 4-H so our children can learn how to work with livestock. -NOPE, the meetings in our area are only on Sundays, so we won't be participating in 4-H. Boo hoo.-
-Continue studying permaculture techniques to implement in our farm design. CHECK
Year Two-
Amend the soil for garden beds. CHECK (Double digging a garden is back-breaking work, just to warn ya. But you'll LOVE the results! I love our garden bed!)
Plant one vegetable garden bed this year, 100 feet long and 4 feet wide. CHECK (I even edged our garden with large limestone blocks this year- it's lookin' good! It finally looks like a real garden instead of a random patch of pasture.)
Begin planting fruit trees for our orchard. CHECK (2 figs, 2 pomegranates, and 2 peaches are planted. We're still looking for 2 persimmons and 2 jujubes.)
Expand poultry flock to include ducks and geese, which will live in pools made in the fruit orchard area. -Our goslings will arrive in April!-
Expand herb garden to include medicinal plants. -working on this one-
Improve the barn so it's ready for livestock.-working on this one-
Reseed the pasture so it has a healthy ecosystem of grasses. -working on this one-
Build a beehive and begin beekeeping in the pasture. NOPE (Maybe we'll get to this next year after we help friends with their bees to gain hands-on experience. And after I conquer my huge fear of flying, stinging insects. Maybe.)
Raise meat goats to keep brush and weeds under control in the pasture. (We are hoping to buy three goats this spring after we repair the pasture fences and install gates.)
And looking ahead to the next couple of years:
Year Three-
Add another vegetable garden bed, 100 feet long and 4 feet wide.
Add domesticated grape vines to the property
Plant native berry bushes, including blackberries and blueberries.
Add some dairy goats or a Jersey cow so we have our own milk supply, then we can produce home made butter, cheese, cream, yogurts, kefir, etc. with farm-fresh milk.
Year Four-
Add another vegetable garden bed, 100 feet long and 4 feet wide.
By now I'm hoping our food production will be largely self-reliant. Unless calamities occur to set us back, we'll be using plenty of veggies from our three large garden beds, fruit from our bushes, vines and trees, eggs and meat from our chickens, milk from our large livestock (either cow or goats), and sweetener from our beehive. It is presumed that we will preserve the harvest each year with canning, dehydrating, and freezing so we won't have to buy much produce during the extremely hot or cold months of the year.
Wednesday, January 23, 2013
How not to install tile
| Our newly-tiled shower |
When we purchased this house last year, we found lots of interesting hidden details.
Let's revisit the memory of when we scrubbed the shower for the first time, shall we?
The tiles literally popped out and disappeared into the wall space one by one, leaving behind black holes in their wake.
We were left with a row of gaping holes in the middle of our shower.
Evidently the previous builder didn't believe in doing a job correctly.
The tile was mounted on just dry wall.
And evidently the previous owners didn't believe in using caulk.
Of COURSE it rotted away.
(Unfortunately I couldn't find any old pictures of our nasty shower to share. Just imagine it the most horrible, moldy drywall you can, mkay?)
So we learned how to rebuild walls and install tile this year.
Let me rephrase that.
We learned how NOT to install tile this year.
We learned all the wrong ways to do the job, through classic trial-and-error.
Let me explain.
We thought we had a brilliant plan.
We purchased assorted surplus tile in an attempt to save money.
All the tile cost us only $20 instead of hundreds.
I was going for a mosaic kind of look with several shades of natural-looking tile.
In my head it look so great.
But then our problems began.
Inexperienced DIY-er that I was, I didn't realize tile isn't true to its measurements.
You can buy 6 inch tiles, but it's not TRULY 6 inches square.
This meant all of our mismatched tile were slightly different sizes and slightly different widths.
Which made tiling the shower a nightmare. Or a comedy, depending how you look at it.
We spent hundreds of hours shaving off edges of tile to make them fit.
Ug.
It would have been way better to just buy new tile that all matched.
We COULD have done the tiling all in one weekend if we had matching tile, but no, that's not the way it worked for us.
Our desire to save some money cost us in big time in labor later.
SO- did I tell you it took us months to do this job? (Closer to a year would be more accurate.)
We'd work on it for hours and get only a couple rows of tile installed.
So then we'd give up for a couple weeks and work on other, more rewarding, projects someplace else in the house.
In the meantime, my bedroom floor was full of tiles and tools.
It looked pretty awful, even when the tiles were stacked neatly in rows.
We had to force ourselves to work on this beastly project.
After months and months of work, we finally finished!
YAY! (insert exuberant happy dance right here)
I can't tell you how spoiled I feel having a usable shower in the master bathroom.
I feel like a queen, isn't that funny?
Wednesday, December 5, 2012
A Day at Hogwarts
Magic wands, wizard cloaks, and spell books- oh my!
We had a lot of fun preparing for everything for Sarah's Harry Potter themed birthday party!
Earlier we had made magic wands for all the children. The wands were really easy to made and they looked pretty convincing.
Invitations were printed on card stock in an old-fashioned calligraphy style. They read:
Dear Student,
We are pleased to inform you that you have been invited to Hogwarts School of Witchcraft and Wizardry to participate in special mid-term classes in Potions, Charms, Transfiguration, and Care of Magical Creatures.
This special celebration is in honor of Gryfindor's newest head girl, Sarah Kingsley, International Confederation of Prefects. Classes will begin at the stroke of 2:00 on November-----.
Please come to our secret location, currently disguised as a Muggle (non-wizard) residence at -----. There you will find the magical door visible only to Hogwarts students and friends. The secret password is "Flibbertigibbet". The surrounding area is well-protected with Memory charms, so it will be safe to practice magic indoors and outdoors.
Feel free to dress in either wizard robes or Muggle clothing.
If you are unable to respond by Owl Post, please use the Muggle telephony system and dial ----.
We look forward to your arrival at Hogwarts!
Sincerely,
Mrs. Renae Kingsley, Headmistress of Frolic and Feasts, Hogwarts Academy
The invitations were folded and sealed with red sealing wax. The name of each guest was written in calligraphy on the envelope. I also put a couple small feathers sticking out to make it look like an owl delivered it.
| Our Secret Door to Hogwarts |
I created a magic brick wall for the guests to run through as they entered the magical setting of Hogwarts.
Luckily I found a perfect brown canvas curtain at the thrift store, so I used that as my backdrop.
I purchased a fat sponge from the hardware store and used 4 different colors of brown craft acrylic paint to create the bricks. I added shading and highlights in an attempt to create an old 'industrial' look so common in British railways.
We simply suspended a curtain rod across our doorway and hung the curtain.
The guests all giggled when they said "Flibbertigibbet!" and ran through the wall.
They even remembered to say the magic password each time we went outside to play outdoor games.
The inside of the house felt magical as soon as they entered and saw the decorations and heard the magical soundtrack from the Harry Potter movies. It felt so delightfully festive!
As guests arrived, we provided their school supplies in the entryway.
A table draped in black served as our 'store'. It held our black wizard cloaks (which I snagged for $2 each at the thrift store during Halloween) and spell books on one end. The children tried on the cloaks until they found one they liked. The spell books were simply made by cutting printer paper into halves, then folding those in half again. The cover is a half-sheet of black construction paper. We stapled the binding and wrote 'Spell Book' on the cover with a white crayon in scrolling letters.
Earlier that week I had made feather quill pens for the guests to use during 'classes'.
My children collected pretty feathers on our property (with 35 chickens, there's a lot of pretty feathers laying around!) and I trimmed them to accommodate a pen. We stripped ball point pens of their cases and taped the pen securely to a feather with silver duct tape.
The children LOVED their quill pens and thought they were such a cool party favor. They really enjoyed taking notes during potions class with these pens.The nice part is I only spent around $3 to make 15 pens!
| Quills for class |
The next station was the wand shop. I told a story that Ollivander (the wand craftsman in the books) couldn't make it to the party, so he left me a box of wands to use.
I had the children come up one at a time to find the right wand. (In the book the wands pick their owners rather than the other way around).
I'd let them pick a wand to try out and I'd describe what magical item was in the core of each wand. (For example: Oh you picked a wand with a Pegasus feather core! Good pick! Now give it a swish in the air and see if it likes you! No? Let's try the pixie dust wand over here....)
The kids were SO excited to see which wand they had. I told them that the magical essence in the wand core was one of the following: a dragon heart-string, a Griffin feather, a strand of unicorn hair, a Pegasus feather, pixie dust, or a Phoenix feather.
They were so delighted with their wands!
We used them to play games in the party, as you'll see later on.
| Ollivanders Wand Shop |
We also had a chest of 'wizard gold'. (It's actually Nathan's large coin collection. He collects coins from around the world. It was a perfect prop for the party!). After each game, I rewarded winning teams with coins to spend later at Honeydukes store.
The kids marveled over the foreign coins and exclaimed how neat they looked. They were definitely better than using plastic pirate gold from the party store.
In the kitchen I had set up the Potions Class with this decor:
| Potions Class is ready to begin! |
I collected apothecary jars from the thrift store and made potions labels to glue on them. The labels were printed on heavy card stock I picked labels that looked a bit spooky so I use reuse these bottles as Halloween decor next year. (Won't that look so cool on the mantle?)
| Up-close view of an aged potion label: Dragon Scales |
I painted the labels with thin washes of watercolor in an attempt to artificially age them so they wouldn't look unnaturally white and new.
I applied labels with Mod Podge. Some bottles I wanted to reuse for other things, so I didn't glue labels on them. Instead I tied them to the bottle with string.
We also set up Honeydukes Candy Shop in our dining room hutch.
We served pumpkin pasties, licorice wands, lemon drops, pixie dust (made with real Cornish pixies!), cockroach clusters, cauldron cakes, pretzel wands in two flavors, and Bernie Botts Beans.
| Sarah peruses Honeydukes to pick a treat |
I'll write the details of our class activities and games (and potion recipes) in my next post.
Until then, here are some glimpses of our guests after the party ended. They had a lovely time playing with kittens, riding tree swings, and pretending to shoot spells at each other with their wands.
The following week lots of parents came to me and told me their children had a most wonderful time at our party. Sounds like it was a success!
Tuesday, October 9, 2012
How to make Jewelry and makeup organizers
My goal this year was to make my home a home of order.
I seem to make this resolution EVERY year, which doesn't speak much of my yearly progress. I am only a failure if I give up, right?
My recent project focused on tackling the clutter and chaos in my bathroom.
Everything was kept in a little plastic drawer unit that sat on my counter.
It looked awful and wasted my time.
I hated digging through my makeup containers trying to locate a specific product.
My jewelry was tangled.
I needed to get everything off my counter space into the vertical space.
This was my solution:
I love how everything is orderly and accessible in a hurry (which is really helpful Sunday mornings when I have only 10 minutes to get ready for church- gotta love those early-morning meetings or choir practices!).
It really streamlines my mornings, and I like the visual appeal of this system.
This is a tutorial for how I made my bathroom organizers.
I found two matching frames at the thrift store and re-purposed them.
(Editor's note: I love snagging good frames at the thrift store! The uglier the print is, the cheaper the frame is. There are some fantastic frames holding ugly faded kitten prints. I paid $4 for each of these frames. If you pick up frames for a project, be sure to check the joining at the corners. That's the only part of a frame that can fail.)
The frames were an ugly color, so I repainted them with a copper spray paint. There was no primer necessary since the paint I chose would adhere to any surface (Even plastics! You'll see why this is cool farther down.)
I wanted an aged look, so I applied a wash with Burnt Umber acrylic paint onto the frame, quickly buffing the paint off the raised scroll-work with a cotton rag to make it stand out.
The directions are a bit different for the two organizers. To read about the jewelry organizer, scroll down a bit.
Here is how I finished the make up organizer.
Nathan cut out a piece of sheet metal to fit inside the frame so I could organize everything with magnets. (Be sure you don't buy aluminium sheet metal- the magnets won't stick if you do.)
This was the most expensive part of the project. I was surprised how expensive sheet metal can be. I think I paid $20 for it, but we didn't use the entire sheet. Maybe if you buy sheet metal someplace other than Lowes you can get it cheaper.
(The leftover metal is going to be installed inside our kitchen cabinet doors. Why? To store all the to-do lists, school announcements, and artwork that normally clutter the fridge. )
I wrapped a pretty batik print fabric around the metal and glued it into place.
I glued magnets onto the backs of my makeup compacts so they would stick to my organizer. This was super easy and pretty quick to accomplish. My Littles were so eager to help with this part.
I wanted my brushes to also be stored on the frame, so I made a pretty container for them.
Can you guess what I used?
It's a plastic frosting container that I spray painted copper. Ta-Da!
I glued several magnets on the back like this:
And viola! One gorgeous organizer was done!
The jewelry holder was a bit different to create.
It doesn't need the sheet metal background. Instead I spray painted some hardware cloth with copper paint to match the frame. I cut it to size and just placed it inside the frame on top of the fabric.
I purchased some S-hooks from the hardware section of Lowes and painted those as well. I just popped them onto the hardware cloth and hung my necklaces. Ta-Da!
The total price tag for these organizers was around $37.
Reclaimed frames- $8
Sheet metal- $20
Copper spray paint- $5
S-hooks- $1
Magnets- $1
Fabric- Free, from my fabric stash
Hardware cloth- Free, from our barn
An organized bathroom- Priceless.
Linked to:
Wednesday, September 19, 2012
From trash to treasure: How to Sew Easy Removable Throw Pillow Covers
How to turn boring, dated (of just plain ugly) throw pillows into something beautiful and new!
I wanted to add bright colors to our living space, but I'm not brave enough to paint a wall vivid colors. It's too permanent. I thought making new throw pillow covers would be an easy, low-risk way to experiment adding more color to our space.
This seriously took me only 15 minutes per pillow (except the first one I made- I had to unpick the seam after sewing the incorrect sides together. Woopsies! Since you have these directions, you won't make my same mistakes, right?).
Here's how to make your own easy throw pillow covers in less than ten steps.
Supplies:
- A 6/10 yard of 55″ fabric (get more fabric if you're making a pillow larger than 18 inches across)
- A half yard of 55" plain canvas or duck cloth for the back of the pillow
- A drinking glass and pencil
- A sewing machine, iron, ironing surface, pins, scissors and thread
- An ugly throw pillow waiting for a new life (if you don't already own one, thrift stores are a great place to pick them up!)
Step 1
Purchase your fabric. I found ours at JoAnns in the outdoor upholserty section. I wanted super durable fabric that could hold up to a lot of cleanings and abuse. I absolutely fell in love with this cheerful waterproof/stain-proof paisley:
I had one small problem: It was priced at $44/yard- YIKES!
Lucikly it was 50% off, and I only needed a 1/2 yard, so my total was only $10. That gave me enough fabric to create two large pillows and one smaller lumbar pillow.
Step 2
Measure the pillow you will be using for your pillow form. Add one inch to your measurement (this gives you room for the 1/2 inch hem later).
Step 3
Measure and cut the fabric for the pillow cover. You'll need three pieces to make the cover- one front piece and two back pieces.
My pillows were 18 inches square, so I cut my front piece of fabric to be 19 inches square
The two back pieces will need to be as long as the front piece and wide enough so they will overlap. Make sure they have several inches of extra width or else it won't close properly. In my case, the back pieces are 19 inches long. One back piece is 7 inches wide and the other piece is 15 inches wide.
Step 4
For nice-looking corners, place a cup on the corner of your fabic and trace the curve with a colored pencil. This is your guideline for trimming the corners. Mark all four corners of the square piece of fabric and only two corners on one long edge for each rectangle
The trimmed fabric should look like this:
Notice that the back pieces of fabric only have two corners trimmed.
Step 5
Since the straight edges of the rectangles will be exposed, we’ll use a more polished hem. Fold about 1/4″ – 3/8″ of the edge over twice to completely encase the raw edge and stitch it down with a straight stitch.This gives a clean edge for your envelope.
Step 6
Pin the two back pieces, inside out, to the front piece. Make sure the sewn seam of the two back pieces overlap in the middle of the pillow.
Step 7
Sew around the outer seam with a 1/2 inch seam allowance.
Step 8
Turn the pillow sham right side out then stuff with the pillow insert.
Step 9
Admire your new pillows before joining them on the couch to curl up with a good book.
See what I mean? This is a very easy throw pillow that can be whipped up in a few minutes.
In less than one hour I sewed four pillows for my couch. I made a total of 8 pillow covers in one afternoon.
The new fabrics completely transformed my living room into an eye-catching, cheerful retreat. The best part is that these are removable, so I can wash them or trade them out for a new look later.
Linked up to:
Sunday, May 20, 2012
A tour through our whimsical garden
When it comes to interior decorating, I'm pretty hopeless. I could admire people's lovely houses and appreciate the aesthetic appeal of their decorating....but I couldn't tell you how they did it.
I've tried to learn a bit more about interior decorating so I can create a lovely space. I feel like a beautiful home creates a feeling of harmony and peace. I should clarify that to me a beautiful home does not equal expensive accessories. I prefer beauty in a simpler way, like arranging colors in harmony.
I tried really hard to make Sarah's room a relaxing retreat for her. It was so fun for us to work together on it.
Before we begin the tour, let me show you what her room looked like earlier:
Isn't it lovely?! (If I could drip sarcasm from my text, believe me, I would.) This room was plastered with layers of wallpapers when we bought the house. This picture is our family ripping off sheets of wallpaper while we wiggle to Turkish pop music. We love listening to Tarkan while we clean. (Isn't all work more fun with invigorating music for company?)
I had heard horror stories before regarding how difficult it is to get rid of wallpaper. We had our own week-long battle with this atrocious decorating faux-pas. After this intimate experience with paper and glue and elbow-grease, I've decided wall paper will never have a place in our home.
Here is where we are now:
We painted the walls a really light pink. We learned a lesson the hard way in our old house: when painting with pink, ALWAYS go several shades lighter than the color you originally picked. It's the only way you won't end up with atrocious, energy-sapping Peptobismal Pink. The lighting in your house is always darker than the lighting at the paint store, so the pink paint looks darker at home. Trust me.
We found some whimsical wall decals to spice things up. ( I considered just painting them on myself, but this was so much easier and I know she'll grow tired of this look as she grows older, so why invest days painting this by hand? It's all going to come down in a few years anyway, so I decided to take the artistic shortcut. Don't judge.)
Our favorite spot is her flower garden above her closet doors.
Butterflies and ladybugs drift lazily across another wall...
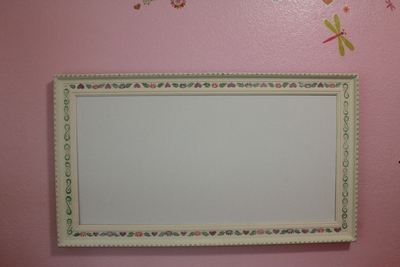
This is a large picture frame we discovered lurking in our attic.
Originally it had the dated dark brown and brassy look of the seventies. I stripped off the paint and painted it like this:
Nathan built a canvas to fit the frame. (I love having a handy husband. He makes everything look easy.) The canvas is waiting for me to paint it with a playful fairy tea party. Maybe I'll get that done this summer? Who knows.....
Since I know you're just dying to explore her room more (okay maybe not....those who aren't interested can leave.) I'll show you.
This is her 'natural museum' space. She collects fossils, sea shells, unusual rocks, furs, and animal bones. Her skull count currently includes skulls from a cow, a chicken, and a fox. She gets so excited when she finds nature's artifacts. One of her favorite places to visit is the Austin Nature and Science Center.
She loves to make embroidered art. Here are an alphabet sampler and a favorite scripture on her dresser. The wall hanging is one I made for her years ago.
Her 'special things' shelf includes fragile glass unicorns.....and her treasured slingshot. Isn't it an interesting glimpse into her personality?
Her baby blessing dress graces the wall above her head. This is the same dress I was blessed in when I was an infant. I like to decorate with meaningful items full of sentimental value.
Framed doilies hug the space above her bedroom door. It's a great place to tuck in one last piece of art. We found these little creations at an antique store. I think they're beautiful.
She adores her room and spends so much time there now. It's so welcoming and cheerful, even the boys are drawn to it. We love to sit in her plush reading chair and read aloud together.
I'd call this one decorating success. Now if I could just figure out what to do with my own room...
Subscribe to:
Posts (Atom)